Create an event
Go to My Events and click on the Create Event button to navigate to the Create Event page.
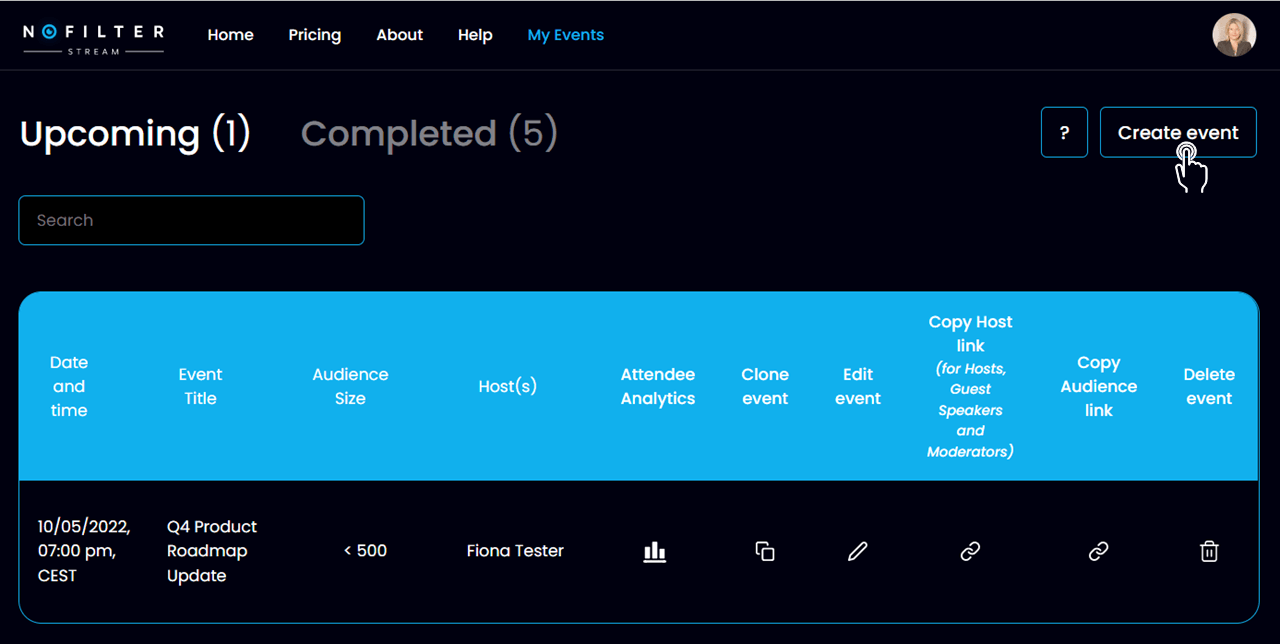
Note that, as a Pro subscriber, all the events you create will automatically be recorded and analytics provided, with no configuration required!
The Create Event page is made up of six sections.
- Event Description
- Participants
- Event Branding
- Time and Date
- Summary
- Share Event Registration
We'll go into a little more detail on each section below.

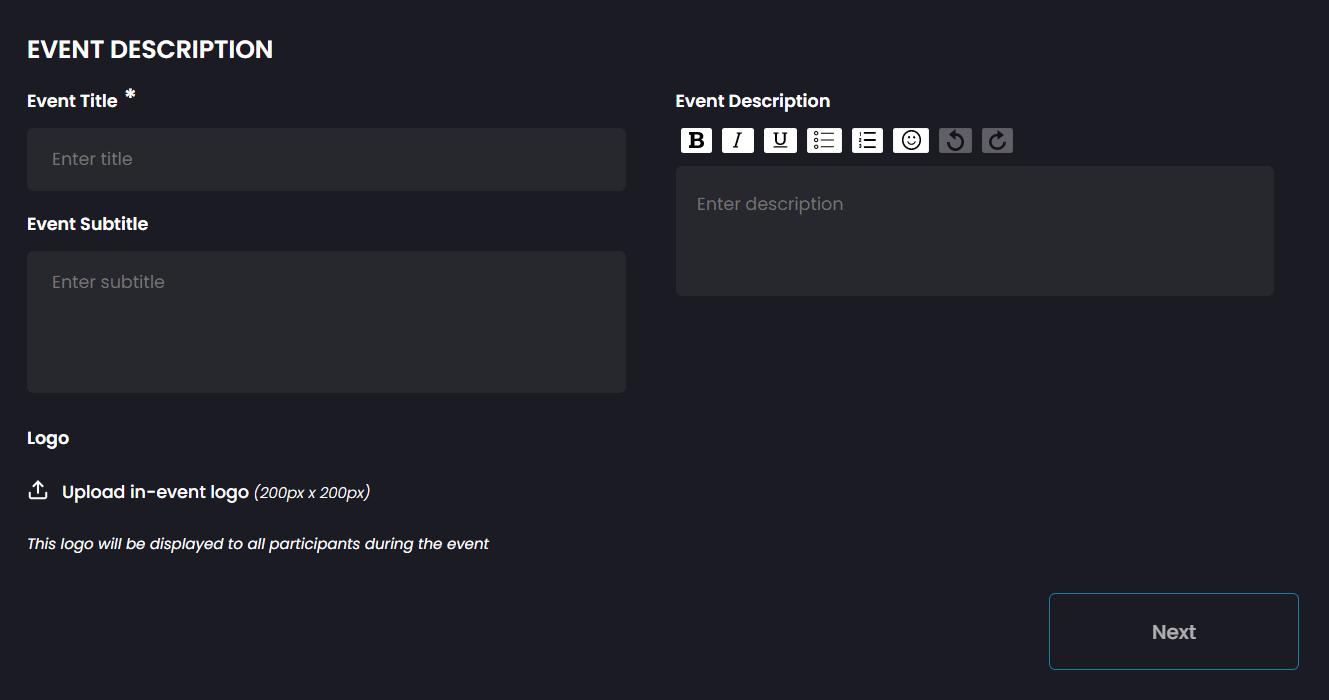
1 Event Description
- Event Title will be the published title of your event. This is a mandatory field and should be no longer than 50 characters
- Event Subtitle will be the subtitle for the event. It will be displayed right under the Event Title on the event registration page that will be generated for this event. We recommend you keep this short and catchy.
- Event Description will be the more detailed information about your event on the event registration page that will be generated for this event. You can include the agenda of the event here, as well as provide some short bios for your hosts and guest speakers, as you wish. You can format the event description text with the buttons above the text box.
- Upload in-event Logo to include your corporate logo in the stream of your event. The logo will be displayed in a small circle on the bottom left of the stream window during the live event. We recommend using a high-resolution .PNG file with transparent background for best results.
2 Participants
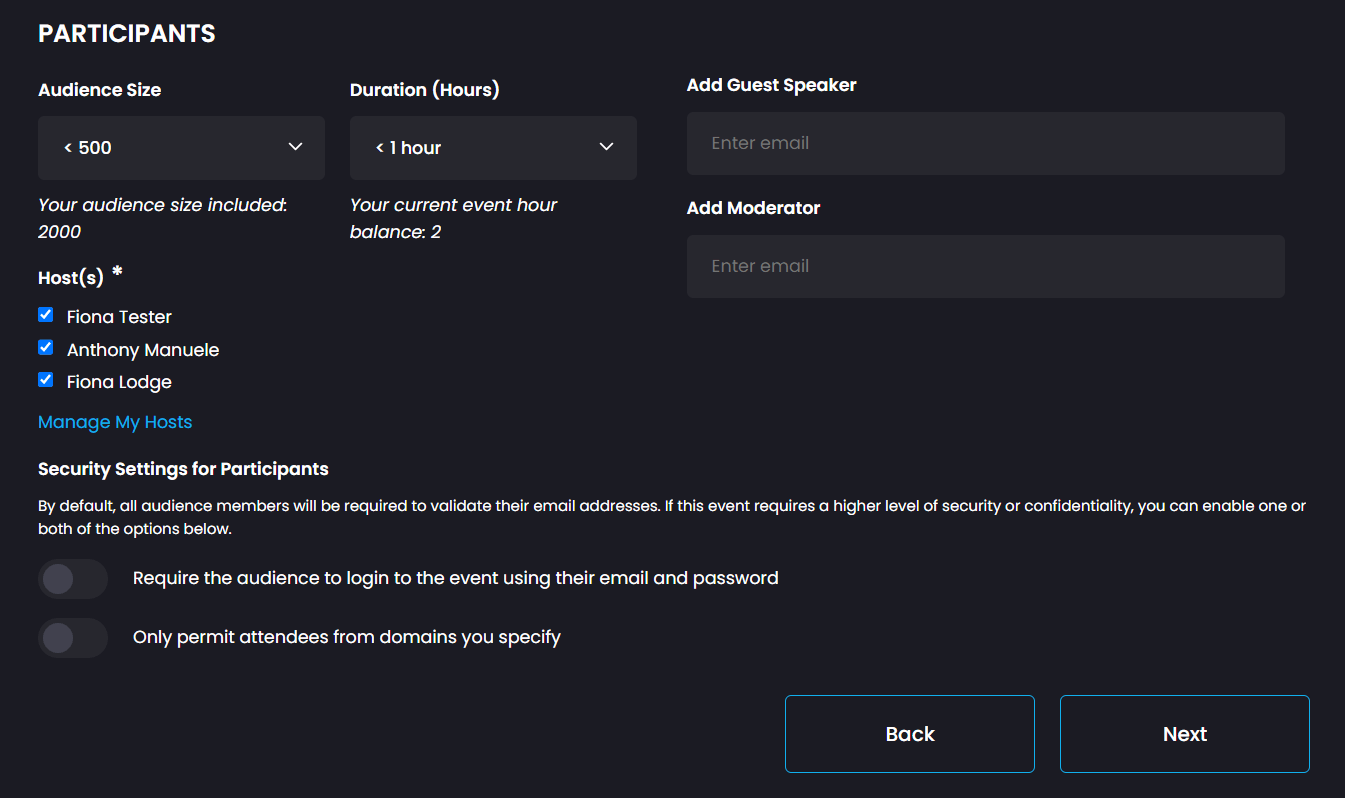
- Audience Size is the estimated number of attendees/viewers that you expect will attend. As a reminder, underneath the Audience Size field, you'll see the audience size that is included in your subscription. You may choose to set an Audience Size that is larger than the Audience Size associated with your subscription, in which case, a quote estimate will be provided in the Summary section at the bottom of the Create Event page. To understand how the quote is calculated see Pro Overage Calculations.
- Duration is where you provide an estimate of how long you anticipate your event will last. You may choose to set a Duration that is longer than your current event hour balance, which is shown underneath the Duration field. If the Duration you estimate is longer than your event hour balance, a button will be provided in the Summary section at the bottom of the Create Event page, to allow you to renew or upgrade your subscription.
- Host(s) is where you identify which of your nominated hosts will attend and lead the event. It is mandatory that at least one host is specified for an event. By default, all configured Hosts are listed and selected. You can remove any Hosts that are not expected to attend by simply un-ticking the relevant check box. If you need to add a new Host or edit your existing Hosts, click on Manage My Hosts, which will launch a pop-up of your My Hosts page, so that you can make whatever edits you need to and then return to continue creating your event.
- Add Guest Speaker to invite one or more guest speakers to the event. To add a guest speaker, enter their email address and hit return. If it is a valid email address, it will populate into the guest speaker list, below the entry field. You can then continue to add another guest speaker or speakers, if you wish.
- Add Moderator to specify someone who will moderate the audience, the Chat, the Raise Hand queue and who will have permission to delete inappropriate chats and ban attendees that aren't behaving appropriately.
Security Settings for Participants
By default, Hosts and Moderator must login with a valid email address and password to join the event, while Guest Speakers and the audience need to validate their email address by clicking on a link that is emailed to the address they provided on the event registration page. If you want a heightened level of security for your event, you can:
- Require the audience to authenticate is a toggle that you can enable for e.g. extremely confidential events. By default, it is toggled Off, in which case attendees can join the audience simply by registering and verifying their email address. If you toggle this option to On, then each member of the audience will be required to login (using Google, Microsoft or Apple credentials or by creating a new account on No Filter Stream) before they can join the event.
- Only permit attendees from domains you specify is a toggle that you can enable to enforce that only people with email addresses associated with domains that you specify will be able to join the audience. This is useful if you want to ensure, e.g. that only employees of your company can join the audience. By default this is toggled to Off. If you toggle it to On, you will see a pop-up where you can enter a number of domains - just enter each valid domain and hit return to insert it in the domain list. You can use * as a wildcard - for example, if you enter "nofilter*", then attendees with either nofilter.net or nofilterstream.com email addresses will be able to join the audience.
View our Participant Roles and Permissions page to learn more about the roles and permissions granted to each participant.
3 Event Branding
This is an optional section, where you can add your own corporate branding to the default layout of both the event registration page and the in-event streaming experience.
To understand how to add branded content to your event, see Add Branding to an Event.
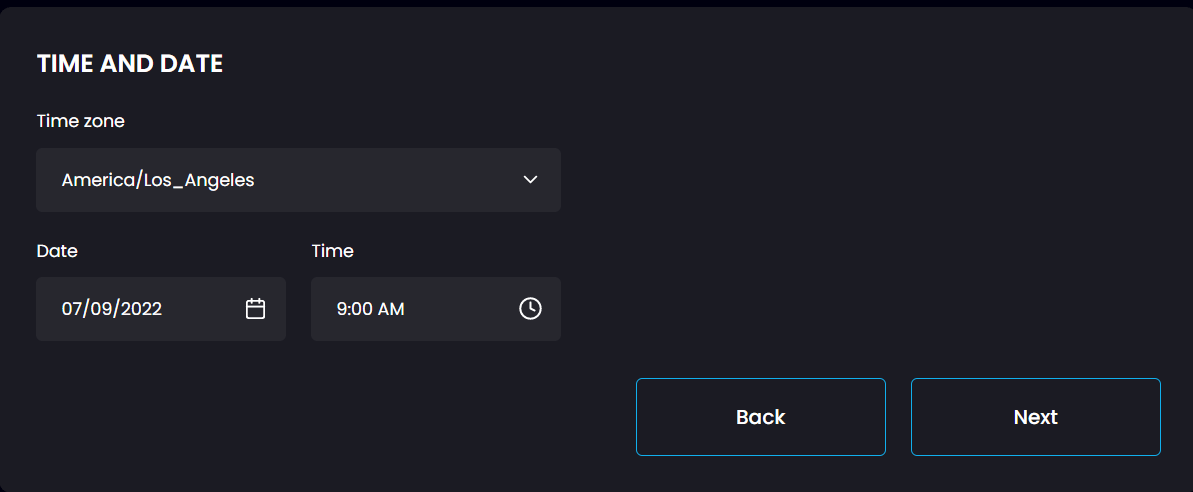
4 Time and Date
Specify the timezone, date, start time of the event you are creating.
Note: The start time must be in the future!
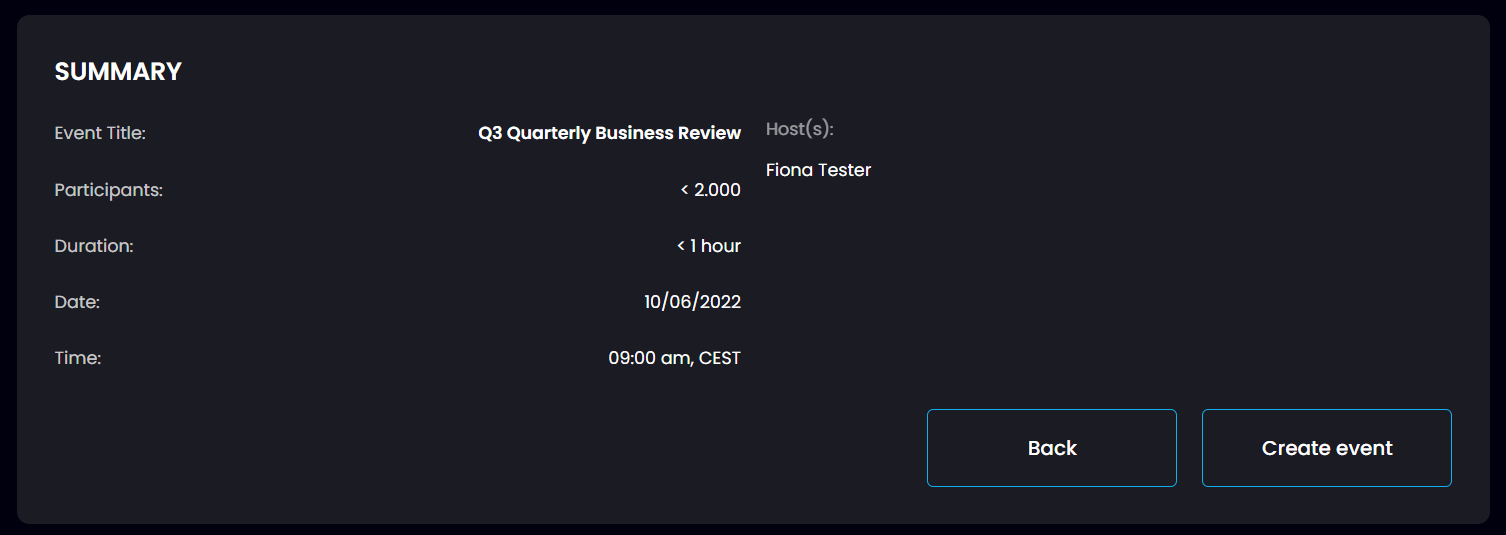
5 Summary
On the Summary page, you'll see an overview of the parameters you specified in the previous sections.
If you're not happy with the summary, you can use the Back button to navigate back to the section where you wish to make changes.
If you're happy with the summary and your estimated Audience Size is covered by your subscription, then simply click on the
Create Event
button to finalize the creation of the event.
If, on the other hand, you specified an Audience Size that is larger than is covered by your subscription, the the Summary section will provide you with a quote estimate for the event - this is an estimate of how much you will be charged, after the event, if and only if the audience size you estimated does turn up and if the event does run as long as you estimated.
Note: The actual overage charge at the end of the event will be based on the actual audience size over the actual duration of the event. See Event Overage Calculations for more details.
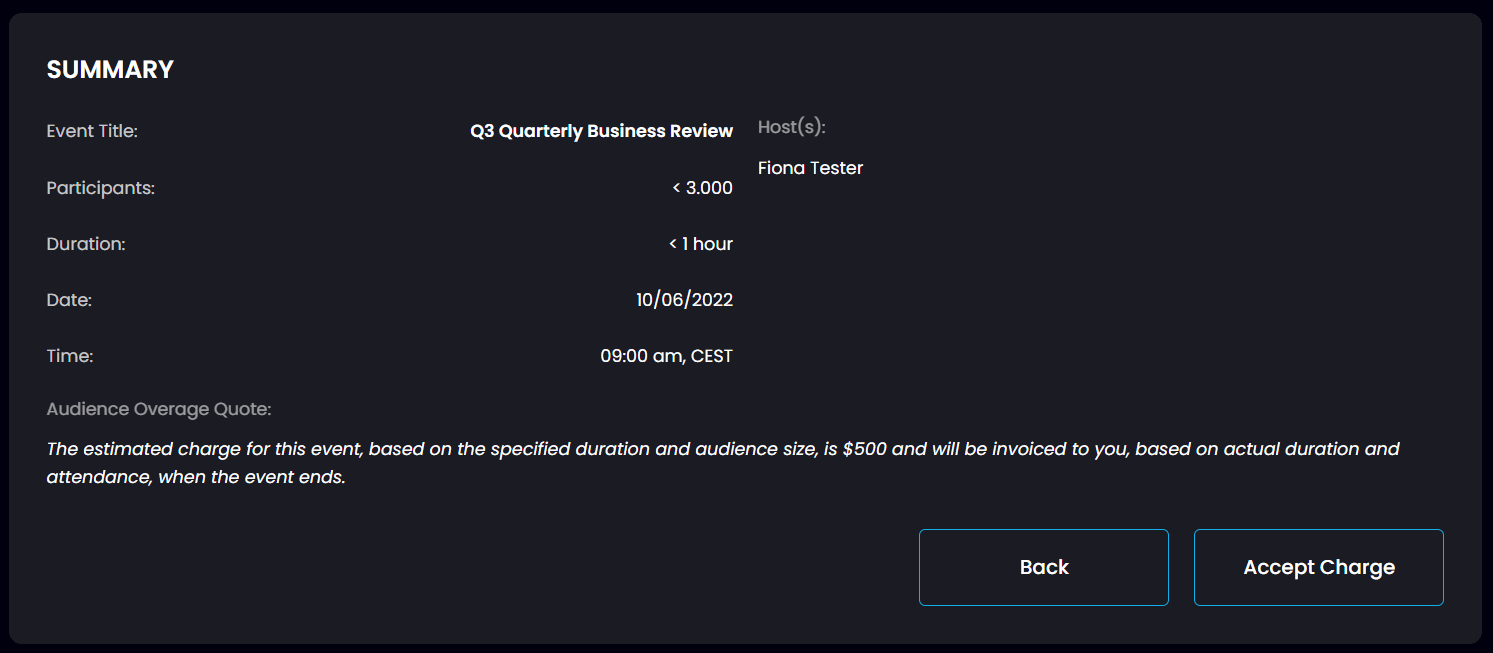
If you're happy with the summary and your quote estimate, then click on the Accept Charge button to finalize the creation of the event.
Once you've clicked on the Create Event or Accept Charge button, strmz.io will generate the event registration page, the Host link and the Audience link.
Also, a number of emails will automatically be dispatched:
- An Event Scheduling email will be dispatched to you, confirming the details of the event
- An Invitation email will be dispatched to each host, guest speaker and moderator that you configured on the Participants panel. This email will include a summary of the event, a meeting invitation that they can insert into their calendar and a link they can click on to register for and join the event.
6 Share Event Registration
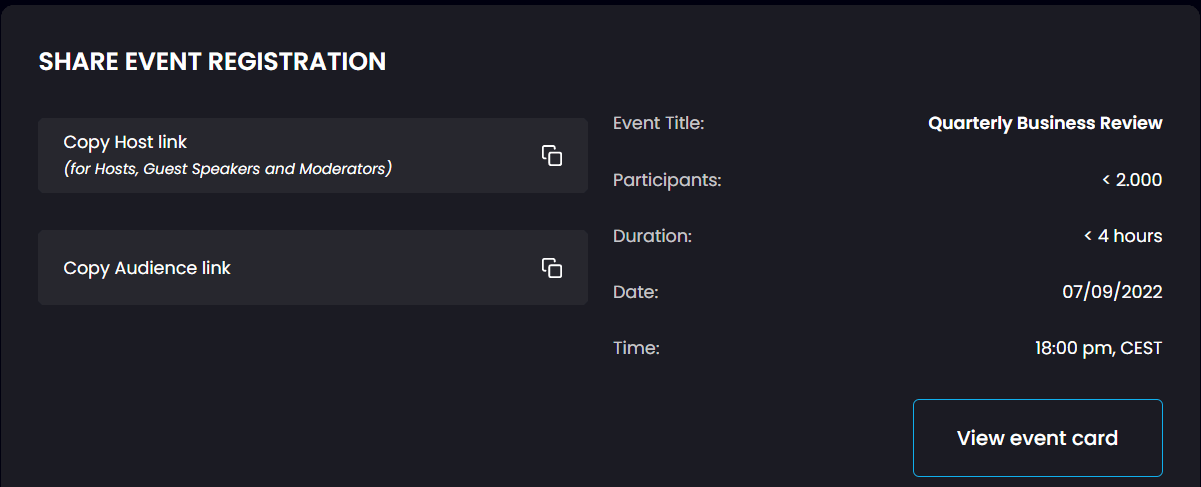
The last section of Create Event gives you all the information you need to distribute invitations to the event.
- Copy Host Link is the link that has been emailed to hosts, moderators and guest speakers and that they will click on to join in the green room for final rehearsal and prep, up to half an hour before the start of the event
- Copy Audience Link to distribute to your intended audience of your event via email invitations or social media channels
- View Event Card to see the detailed information of your event