Add Branding to an Event
Event Branding is a feature that is only available to Pro and Enterprise subscribers. It allows you to create beautiful, on-brand experiences for your audience.
- Event registration page: Add your own headers, footers, logo and supplementary information. Set the color scheme for each panel of the page, including both background and text colors.
- In-event experience: Display your own logo during the event, plus provide a branded experience in the audience lobby of your event.
You can create custom branding for a special event or you can establish your own event branding template by creating one new event, design your event branding settings and upload your banners for that event and then, thereafter, just cloning that event and updating it as required to simply re-use the same branding settings and banners.

Branding an event registration page
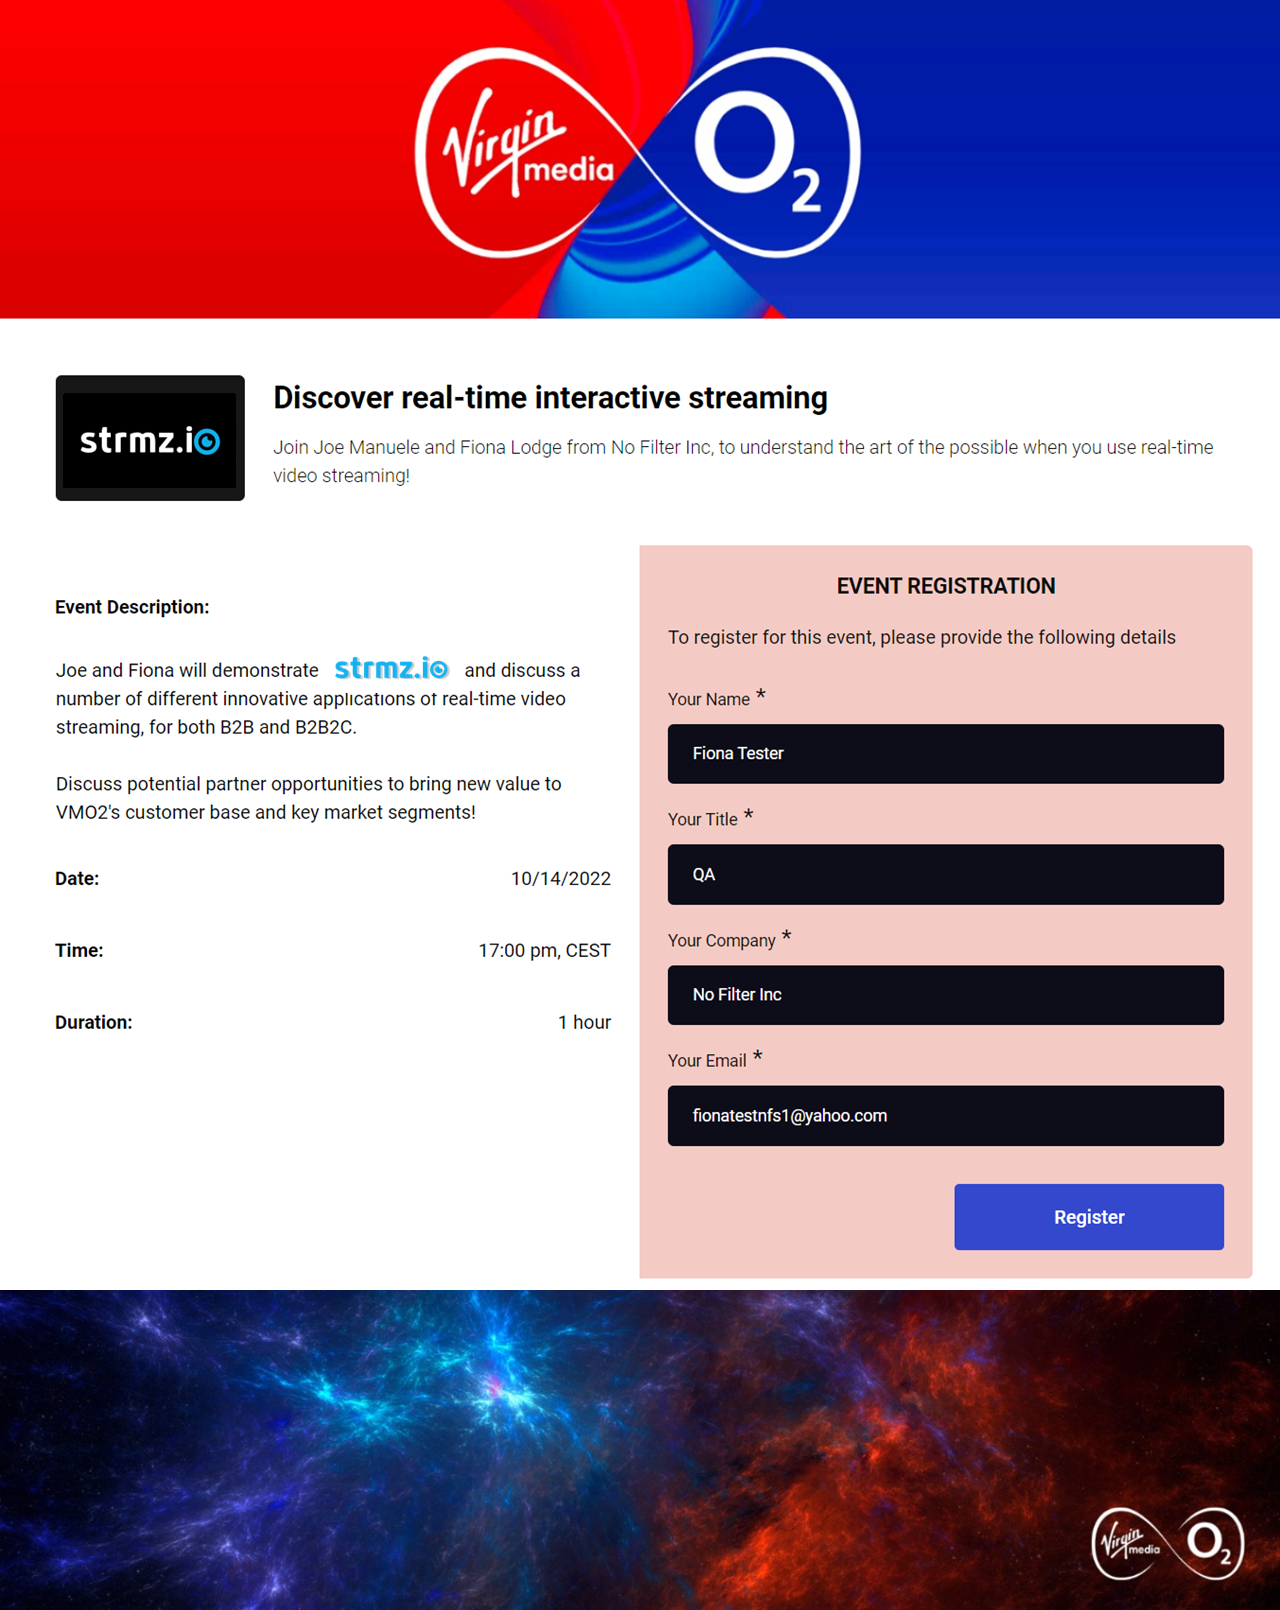
Here are some examples of the kind of branded event registration pages you can create on strmz.io:

To configure branding for an event registration page
Create, edit or clone an event, then fill in the Event Description section and Participants section for that event. This will bring you to the Event Branding section. At the top of the Event Branding section is the Event Registration page design sub-section.
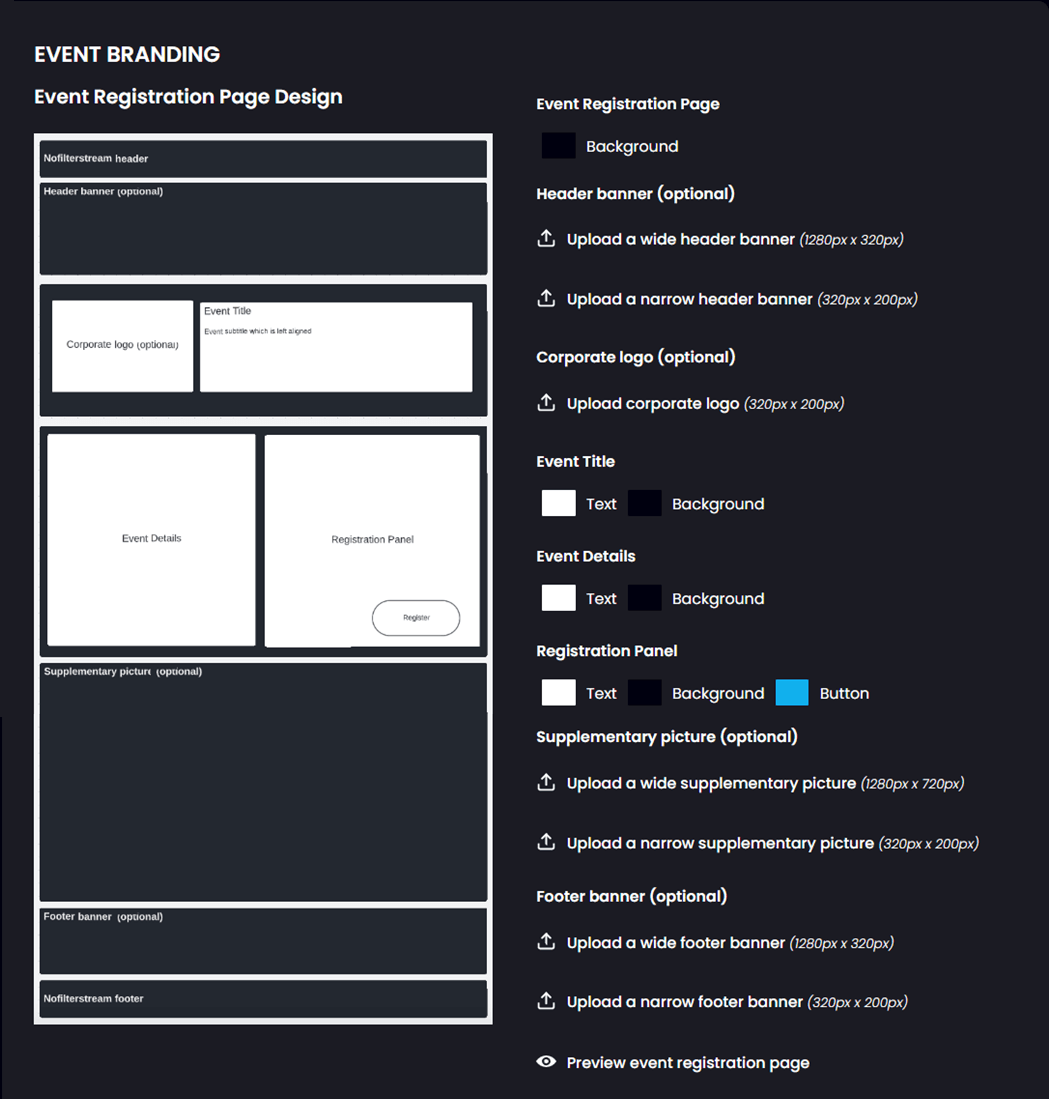
In this sub-section, you will see a picture of the event registration page design template, plus configuration items for each configurable element of the template.
- For each picture/banner that you can upload, dimensions are provided.
- For each type of banner, you can upload a wide (desktop and tablet form factor) banner and a narrow (mobile form factor) banner. We recommend you upload high quality PNG pictures, to create the best user experience on the event registration page.
- When you upload a picture, if it is not exactly the correct dimensions, that's okay - it will be loaded into a Crop screen, where you can zoom and/or scroll to select which part of your uploaded picture will be displayed on the event registration page.
- For the Event Title/Subtitle panel, the Event Description panel and the Event Registration panel, you can set the background color and text color.
- At the bottom of the Event Registration page design sub-section, there is a preview button that will allow you to see how the event registration page looks, in both desktop and mobile form factor, based on the pictures you have uploaded and the colors you have configured.
When you're happy with your event registration page preview, proceed to the next sub-section to brand the audience lobby for the event.
Note: If, as part of designing your event registration page, you need to navigate back to the Event Description section, to update your Event Title, Subtitle or Description, just click on the Back button - all the edits you've made so far in the Event Branding section will be preserved.
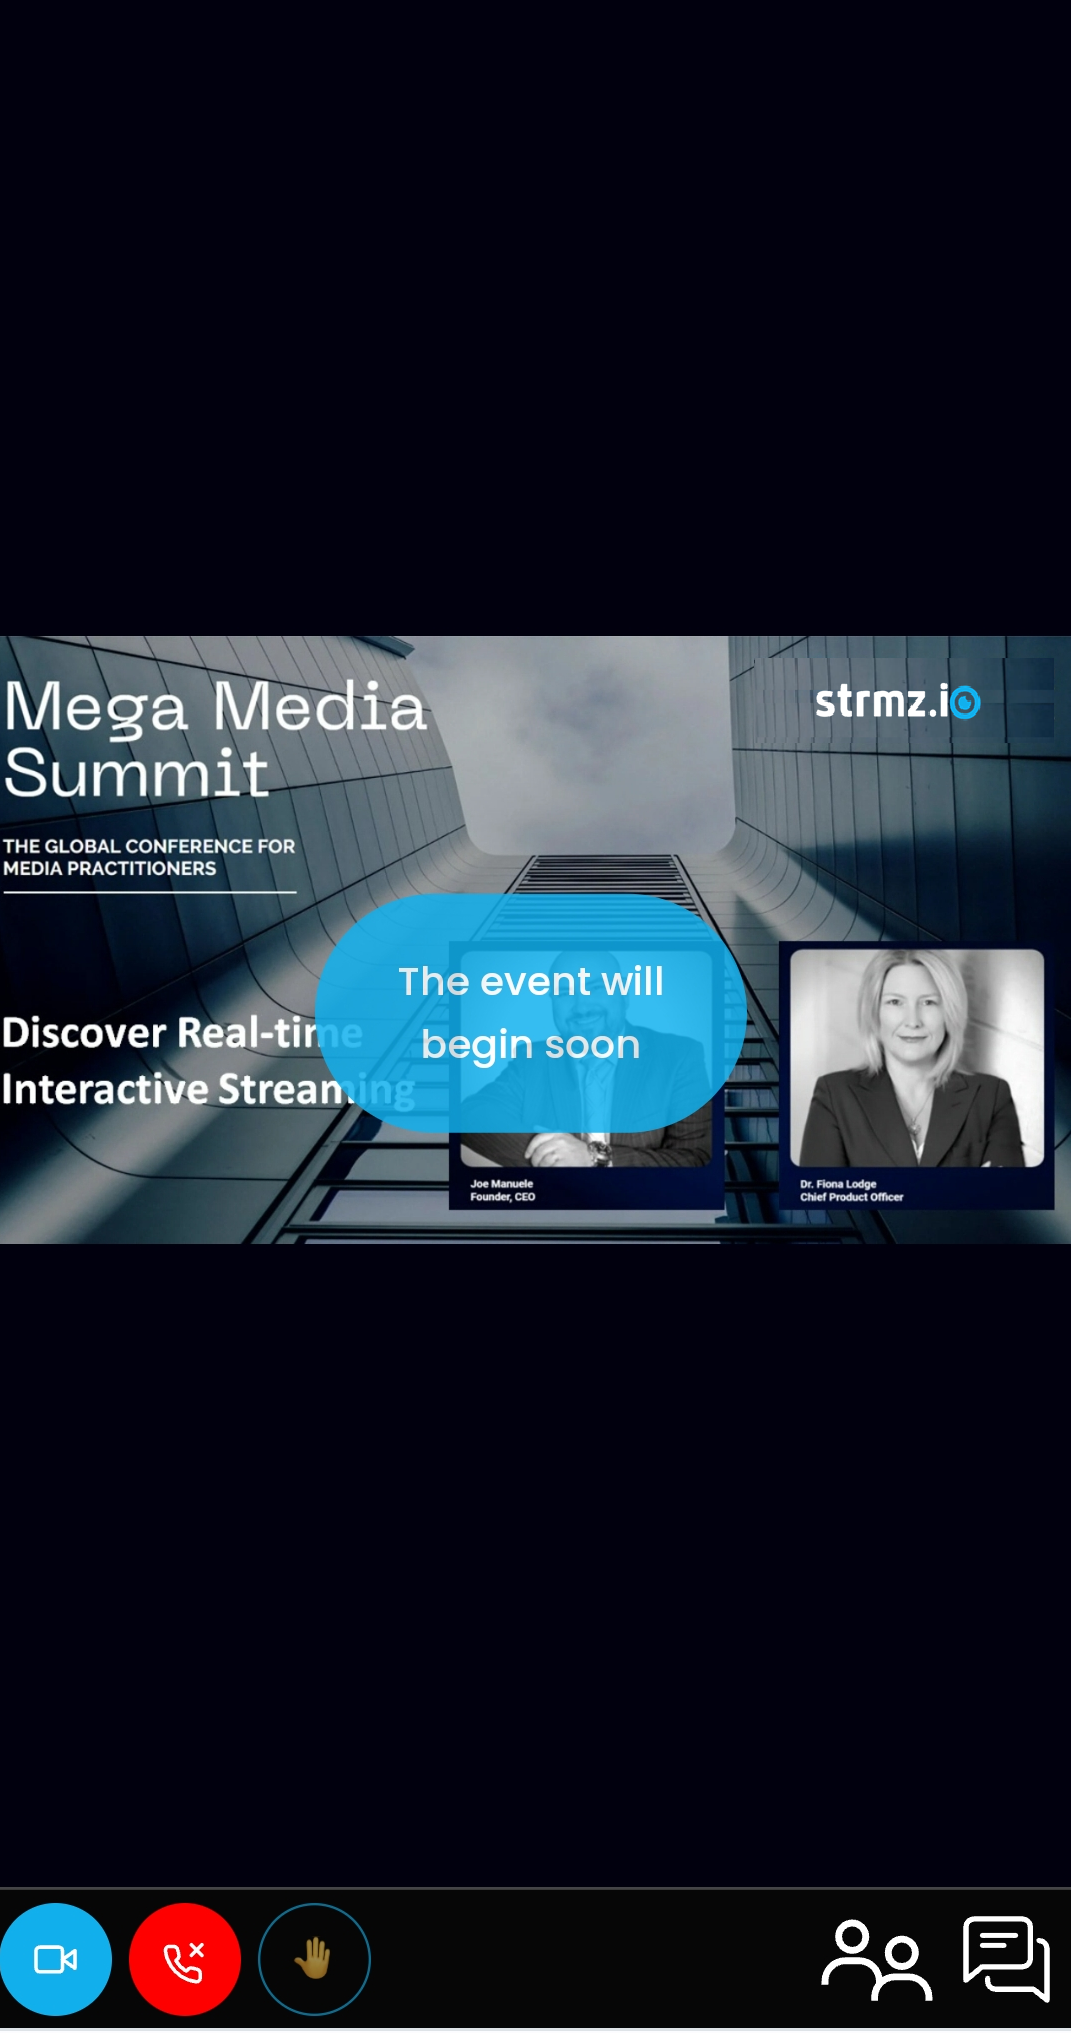
Branding the in-event experience
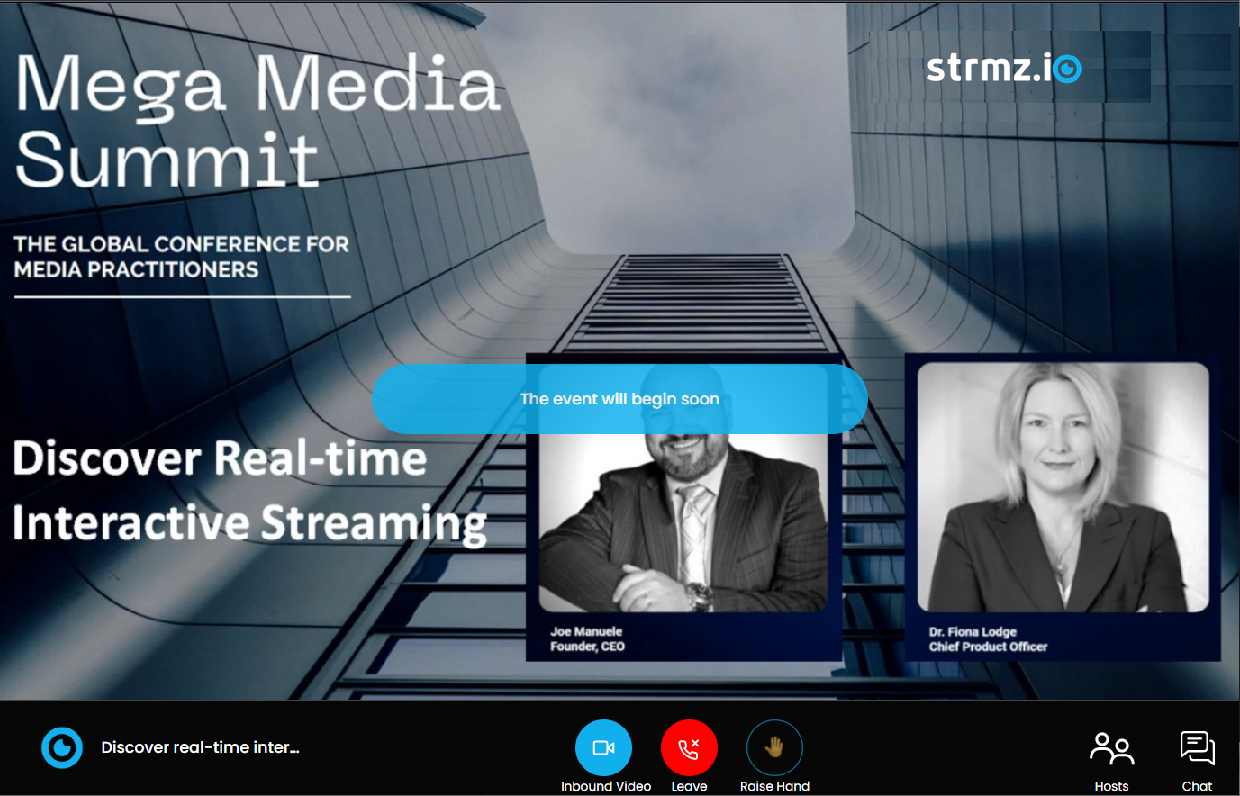
Here is an example, in desktop and mobile form factor, of the kind of branded in-event experience you can create on strmz.io:
To configure branding for the in-event experience
There are two elements you can brand in the live event - you can display your corporate logo in the bottom left corner of the event stream and you can brand the audience lobby of the event.
To add your logo, simply navigate to the Event Description section of the event and upload a high quality PNG picture of your logo, as described in
Create Event. Then proceed, through the Participants section, to the Event Branding section. At the bottom of the Event Branding section is the In-event Audience Lobby Design sub-section.
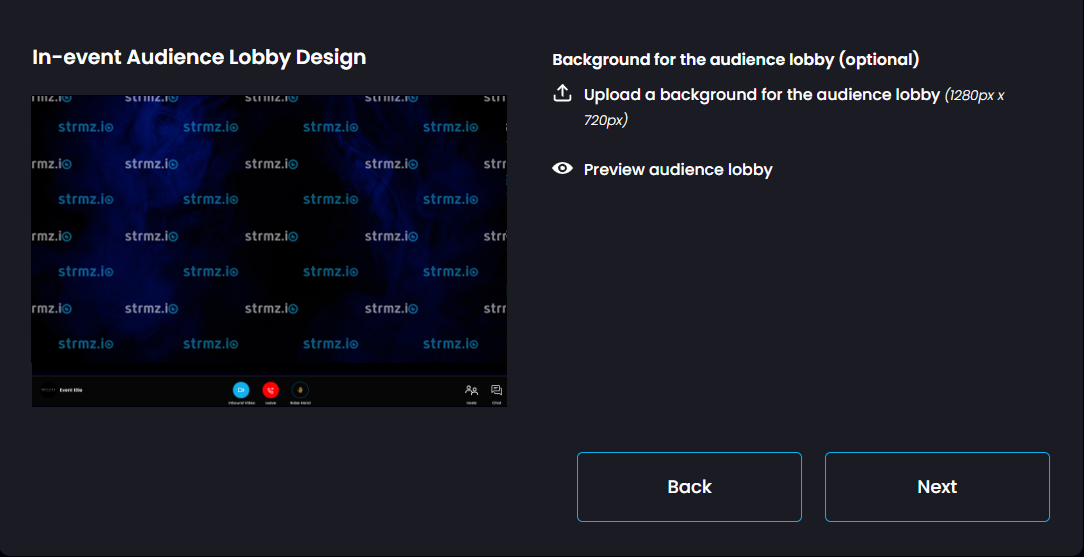
In this sub-section, you will see a picture of the default audience lobby design, plus a configuration item to upload a background for the audience lobby.
- Dimensions are provided for your branded audience lobby picture.
- There is a preview button that will allow you to see how the audience lobby looks, in both desktop and mobile form factor, based on the picture you have uploaded.
When you are happy with your in-event experience preview, click Next and continue to finish creating/updating the event.